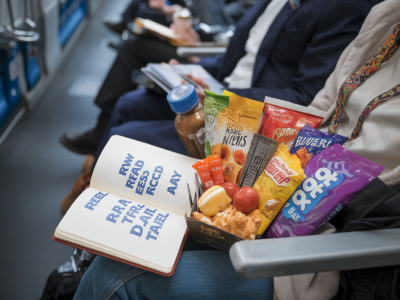
I love small, deliberate trips that feel like a proper escape without needing a suitcase. A three-stop train micro-adventure is one of my favourite formats: hop on, linger for an hour or two at each stop, photograph what you find, then move on. It’s compact, low-fuss and perfect for telling a visual story with just an iPhone and a pocket lens.
Why a three-stop micro-adventure?
There’s a rhythm to a three-stop trip that suits photography: an introduction (the first stop), a deeper layer (the second stop) and a resolution or surprise (the third stop). Each stop can be short enough to keep momentum but long enough to pay attention. For me, this structure turns wandering into a coherent photo essay you can share on social media or keep as a tiny travel project.
What I carry — minimalist gear that works
I travel light. If you’re photographing with only an iPhone, adding a small pocket lens can change everything. Here’s what I bring in my coat pocket:
- iPhone (any recent model with a good camera — I use an iPhone 12/13/14/15 and switch between standard and wide lenses)
- Pocket lens — a compact clip-on or magnetic lens like Moment’s anamorphic or wide lens, Xenvo, or Olloclip. It adds focal variety and optics that feel different from the iPhone’s native glass.
- Small battery pack or MagSafe charger if you’ll edit on the go
- Micro-fibre cloth for lenses and screen
- Light rain jacket and a tiny notebook or phone notes app for jotting observations
Planning the route — pick places that contrast
I plan a route where each stop offers a clear contrast in mood or subject: urban, nature, and a human-focused place (market, café, station platform). The contrast makes the three stops visually interesting and provides natural variety. Use local train maps and a quick search for landmarks near the stations — a park, a viewpoint, a street of colourful houses, or a quiet creek can all be excellent anchors for a short visit.
How I think visually before I arrive
Before I step off the train, I imagine three types of shots I want to capture at each stop: one wide establishing shot, one mid-distance story shot, and one close-up detail. That mental checklist helps me move with purpose without missing spontaneous moments.
- Establishing shot: shows the place and sets the scene — a landscape, market square, or skyline.
- Story shot: includes people or action to give a sense of life — a barista behind the counter, a cyclist passing, kids at play.
- Detail shot: textures, patterns, signage, food, or hands. These are great with the pocket lens.
Using your iPhone and pocket lens together
Clip the pocket lens on when you know you want its look — for example, an ultrawide for sweeping streets or an anamorphic lens for cinematic flare. I avoid keeping it on all the time because the added glass can slightly vignette or soften corners on some models.
Camera settings I use on the iPhone:
- Exposure: tap to focus and slide to adjust exposure. I slightly underexpose bright scenes to keep highlights.
- Lens selection: switch between standard and wide in the camera app. If you have a tele lens on Pro models, use it sparingly for portraits or compressed backgrounds.
- Live Photos: keep it on if you want a little movement; it’s useful for picking the best frame later.
- Grid: enable the grid to compose with the rule of thirds or align horizons.
Composition tricks that work for quick shoots
A few composition habits make images feel more deliberate:
- Foreground interest: include something close to the lens (a railing, leaves, coffee cup) to add depth.
- Leading lines: use railway tracks, curbs, or rows of chairs to guide the eye.
- Negative space: sometimes the quiet empty space tells a stronger story than a busy frame.
- Change perspective: crouch for details, raise the phone high for patterns, or shoot through a window to add layers.
Lighting — the easiest way to improve photos
Golden hour is lovely but not always practical for short trips. Instead, look for soft, diffused light — shade under trees, covered markets or overcast days are your friend. For harsh midday sun, I move subjects into shade but keep a rim light or highlight for separation. Backlighting can make leaves glow and windows sparkle; expose for the highlights to keep mood.
Making the most of busy places
Train stations and markets can be noisy visually. I lean into that energy: wait for a gap to frame a lone figure, use motion blur (move the phone slowly while shooting or use Live Photo then select Long Exposure in Photos), or shoot tight details when wide scenes are chaotic. The pocket lens helps isolate subjects or add an unusual field of view that separates your images from typical iPhone shots.
Editing on the train — quick, intentional tweaks
I edit on my phone between stops when time allows. A short editing routine keeps the project cohesive:
- App stack: I use Apple Photos for quick fixes, Snapseed for selective tweaks, and VSCO or Lightroom Mobile for film-like tone and consistent colour grading.
- Crops: straighten horizons and crop for stronger composition.
- Exposure and contrast: nudge exposure, deepen shadows to add mood, and lift highlights slightly.
- Colour: pick a subtle preset or manually adjust warmth and tint to keep a consistent palette across the three stops.
- Sharpening and noise: apply modest sharpening and noise reduction if you shot in low light.
Telling a story with your three stops
Think of each stop as a chapter. When you sequence images, aim for a beginning-middle-end flow: open with an establishing frame that sets the place, use the middle images to explore characters and details, and end on a small reveal or a quiet image that feels like a closing shot. I like to include a human element in at least one shot per stop — hands, a passing silhouette, or a candid smile — because people give scale and emotion to otherwise pretty scenes.
Examples of shot lists for different micro-adventures
Here are quick shot lists I’ve used for common three-stop themes:
| Theme | Stop A | Stop B | Stop C |
|---|---|---|---|
| Coastal stroll | harbourwide at low tide; boats | cliff path mid-distance; sea birds | pebble close-ups; sunlit foam |
| Market & town | market entrance wide; banners | stall stories; vendor portrait | cup of tea close-up; shopfront detail |
| Green escape | park lake establishing | woodland path; runner/picnic | moss/leaf texture with pocket lens |
Final practical tips I use every time
- Battery check: start with a full phone and a charged battery pack.
- Be respectful: ask permission before photographing people closely.
- Timing: allow 45–90 minutes per stop depending on how much walking and shooting you want to do.
- Stay flexible: sometimes the best photograph is unplanned. Keep an open mind and let the place surprise you.
A three-stop train micro-adventure is a lovely way to practise seeing — quick enough to be do-able any weekend, rich enough to come home with a mini-portfolio. With an iPhone and a small pocket lens, you can make images that feel intentional and varied without carrying a camera bag. Pack light, look for contrasts, and tell a short story with each stop. Then, on the train home, scroll through your images and enjoy the way a few thoughtfully-made pictures can hold the memory of an entire day.