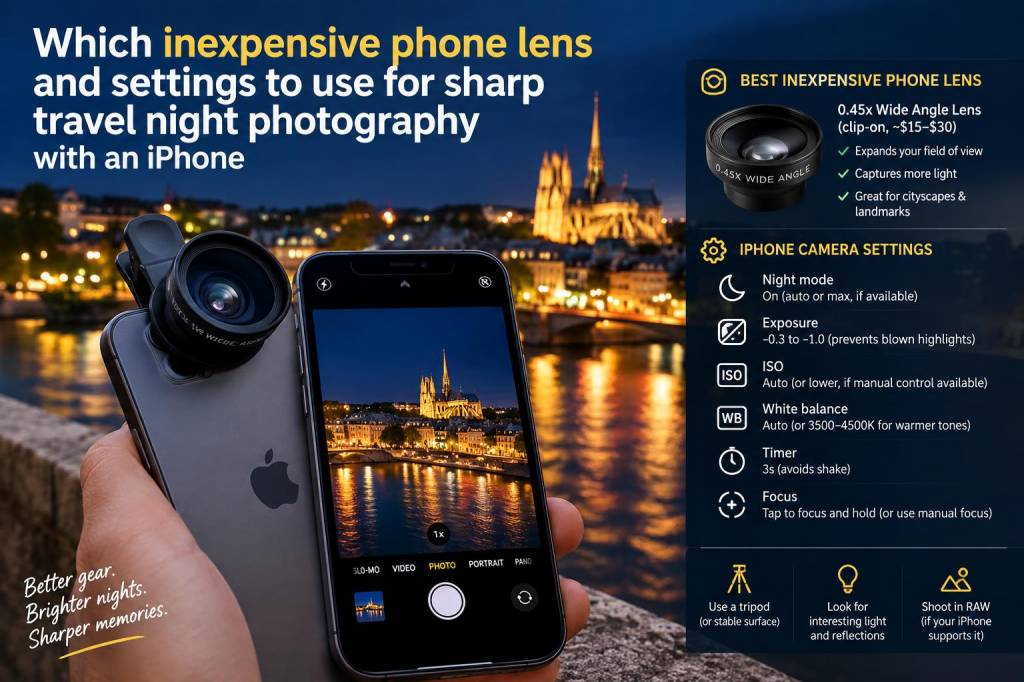
I love photographing cities at night — that quiet hour when neon reflections stretch across wet pavement, when cafés glow and strangers become silhouettes. As someone who travels light and prefers the ease of an iPhone in my pocket, I’ve learned a few practical tricks to get sharp, moody night photos without hauling a DSLR and tripod. Below I share what inexpensive clip-on lenses work well, the camera settings I reach for, and simple habits that make a big difference when you’re shooting handheld after dark.
Why an inexpensive lens can still make a difference
Before we talk gear, a quick note: you can get beautiful night shots with a stock iPhone camera alone, especially with newer models’ Night mode. But the right affordable lens can change the look of your photos in ways the native lens can’t — wider angles for dramatic cityscapes, a mild tele for compressing scenes, or a macro for getting detail in low light. I’m talking about inexpensive clip-on lenses in the £15–£60 range that are lightweight and easy to pack. They won’t match pro glass, but used thoughtfully, they expand your creative options.
My go-to inexpensive lens types (and a small comparison)
| Lens type | Typical price | Best for | Trade-offs |
|---|---|---|---|
| Wide-angle / Fisheye | £15–£40 | Street scenes, architecture, tight alleys | Edge distortion, lower sharpness at extreme edges |
| 0.45x Wide / Wide-angle | £20–£50 | Landscape-like cityscapes, group shots | Some vignetting; needs careful framing |
| Tele / 2x Tele | £25–£60 | Compressing distant lights, portraits at a distance | Can amplify shake; less light |
| Macro | £10–£30 | Close-up textures, raindrops with city lights | Very shallow depth; needs steady hands |
Brands I’ve tried that punch above their price: Moment’s cheaper clip options (if you find a deal), Aukey and Xenvo for basic kits, and some unbranded but well-reviewed clip-ons on Amazon. My rule: choose a lens with a metal mount (less wobble) and read reviews that show real-world night photos.
How I set up my iPhone for the sharpest night shots
Getting sharp night images with a phone is less about cranking ISO and more about minimising movement and letting the sensor breathe. Here’s my usual checklist before I press the shutter:
Recommended camera apps and why I use them
The iPhone Camera is great, but these apps give me more control at night:
With these apps I often shoot RAW (DNG). RAW preserves more tonal information, giving me more to work with in post-processing for noise reduction and sharpening.
Settings I usually start with (iPhone + clip-on lens)
Assume handheld, urban night scene, moderate street lighting:
Composition tips that help sharpness and impact
Sharpness isn’t only technical — composition can make a photo feel crisp and intentional.
Post-processing shortcuts for cleaner night images
I do a light edit on my phone or laptop to reduce noise and boost perceived sharpness:
Practical examples from my travels
Once in Porto I clipped on a 0.45x wide lens, propped my iPhone on a low wall and set a 2-second exposure using Night mode with a remote trigger. The result was a wide sweep of the riverside with smooth reflections and sharp buildings — and no tripod. In another trip, a cheap 2x tele clip helped me compress distant bridges and lights; I raised the shutter to 1/60s to freeze slight movement and used a steady stance to avoid blur.
Finally — a small gear tip: carry a microfiber cloth and a small case for your clip-on lens. At night, lenses easily collect fingerprints from hurried hands and the cloth makes an immediate difference to image clarity.