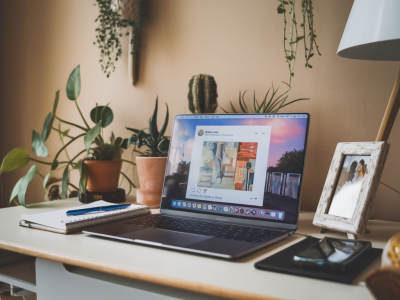
I’ve always loved photographing the food I cook — not because I’m trying to be a restaurant critic, but because a simple plate can hold a little story: a season, a small ritual, a recipe that worked. Over the years I’ve learned how to make those everyday meals look a little more editorial without needing a pro camera or a closet full of props. Your smartphone is more capable than you think. Here’s how I hack mine to make effortless meal photos that feel curated, natural and ready for the feed or a print.
Think like a food editor (but keep it real)
Editorial food photography is less about perfection and more about intention. When I shoot, I ask: what’s the main subject? Where is the light? What story do I want to tell — a messy breakfast, a quiet solo dinner, a lively table with friends? Answering those gives direction to every choice that follows: angle, composition, props and editing.
Use natural light and learn to shape it
Natural light is the simplest, fastest way to get a rich, editorial look. I usually shoot near a large window with indirect light — morning and late afternoon are my favourite. Direct sun can blow out highlights and cause harsh shadows, so I soften it.
- Diffuse harsh sun: a thin white curtain, baking paper or a white bedsheet taped to the window will turn strong light into something soft and flattering.
- Create fill light: use a white foamboard or even a sheet of white cardboard opposite the window to bounce light back into the shadows.
- Backlight for glow: position the dish between you and the window for a gentle rim light that highlights steam, gloss and texture. I love backlight for soups, steamy pasta and drinks.
Composition: tell the story with one frame
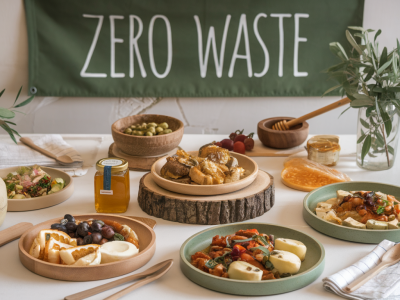
Editorial images often leave room to breathe. I favor negative space and a clear focal point.
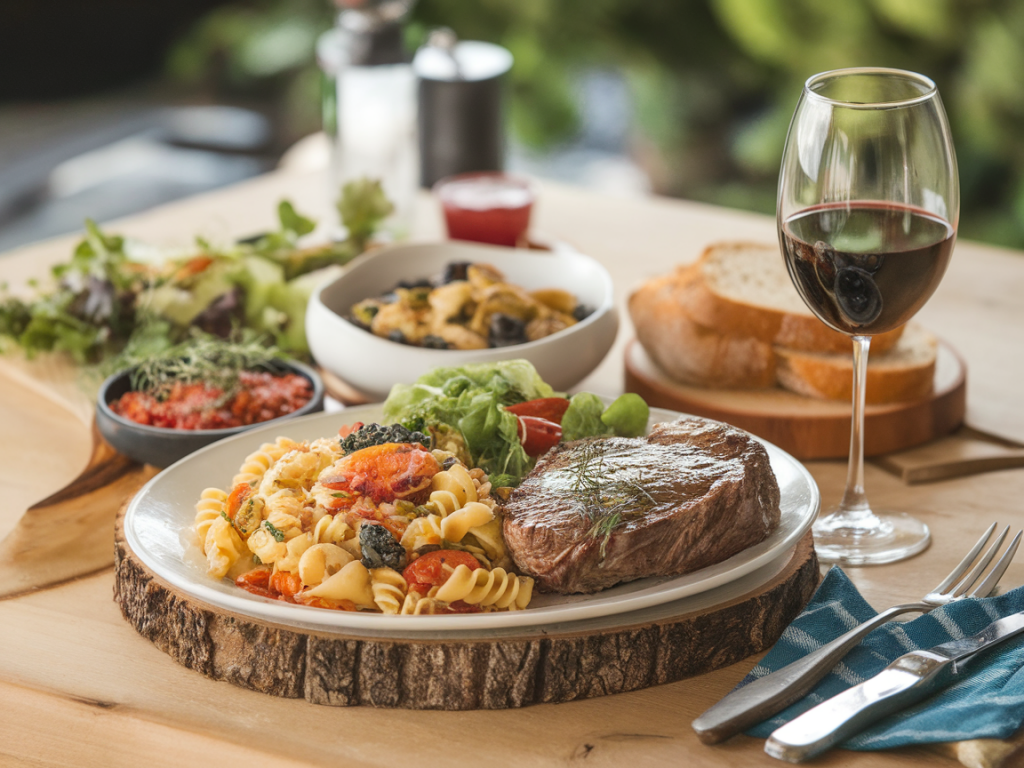
- Choose an angle that suits the dish: flat lay for spreads, overhead for bowls, 45° for plated meals that show height and layers, and eye level for drinks and sandwiches.
- Simplify the scene: remove clutter. One or two props are enough — a linen napkin, a spoon, a lemon wedge. Less often reads more editorial.
- Use leading lines: place utensils, napkins or bread to guide the eye toward the main subject.
- Layer textures: wood boards, stone surfaces, textured linens and ceramic bowls add character without stealing attention.
Make your smartphone camera work harder
Modern phones have powerful tools, but you need to use them intentionally.
- Turn on the grid: helps you align the shot and apply the rule of thirds.
- Lock exposure/focus: tap the screen and hold to lock AE/AF on the subject so the phone doesn’t re-expose mid-shot.
- Adjust exposure manually: slide your finger up or down (iPhone) or use the exposure slider (Android) to slightly underexpose if highlights are blowing out — this keeps colours rich.
- Shoot in RAW when possible: RAW gives you more latitude in editing. On iPhone use Apple ProRAW (if available), on Pixel and Samsung use RAW/DNG in Pro mode or a third-party app like Lightroom Mobile.
- Avoid digital zoom: move closer or crop later. If you need more reach, consider a clip-on lens from Moment or Olloclip for optical quality.
- Stabilise the phone: a small tripod (I like Joby Gorillapod or a simple tabletop tripod) keeps frames consistent and lets you slow shutter or shoot cleaner low-light photos.
Small hacks that make a big difference
- Steam and gloss: add a tiny bit of water or oil on roasted vegetables and meats right before shooting to catch light and add appetite appeal.
- Garnish with intent: a torn herb leaf, a sprinkle of finishing salt, or a lemon wedge can be the visual hook that brings life to a shot.
- Use props as framing tools: place a cup, napkin or knife in the foreground slightly out of focus to create depth.
- Keep plates interesting: don’t always center the dish. Off-centre compositions feel more editorial.
Quick reference camera settings
| Situation | Angle | Phone tip |
|---|---|---|
| Bowl or salad | Overhead (flat lay) | Use grid, shoot RAW, lock exposure |
| Plated main course | 45° | Focus on the front of the plate, use slight underexposure |
| Drinks and sandwiches | Eye level | Backlight for rim highlights, use reflectors |
| Low light/restaurant | 45° or eye level | Use tripod or lean on a steady surface, increase ISO sparingly, use RAW |
Editing workflow that keeps things natural
I aim for subtle edits that enhance, not fake. My go-to apps are Lightroom Mobile, Snapseed and VSCO. Here’s my usual flow:
- Crop & straighten: tighten composition and remove distracting edges.
- White balance: correct first. A slight warm tone can make food feel more inviting, but avoid orange skin tones if people are at the table.
- Exposure & contrast: bring back highlight detail and lift shadows gently for a soft, editorial look.
- Texture & clarity: increase texture slightly to emphasize crusts, seeds and steam. Reduce clarity on backgrounds to keep focus on the food.
- Colour tweaks: desaturate greens or yellows a touch if they’re overpowering, or boost a single colour to make an ingredient pop.
- Sharpening & noise reduction: apply subtly — phones can over-sharpen. If you shot RAW, sharpening is more forgiving.
Practical routines for consistent results
I keep a small kit on my kitchen counter: a clean linen napkin, a wooden board, two plates I love, a small spray bottle of water, a white foamboard and a tripod. Having these ready saves decisions and encourages me to shoot more often. When I’m short on time, a quick 10-minute setup with natural light and one prop will still deliver a clean, editorial shot.
When to call in extra gear or help
For editorial shoots I sometimes use an inexpensive macro lens for close-up texture, a handheld LED light with adjustable temperature (Aputure Amaran is a reliable option), and different sized reflectors. But most of the time, a patient eye and a little shaping of natural light are enough.
If you want, try this mini exercise: cook something simple (a bowl of granola, a grilled cheese, or a colourful salad), set it near a window, choose one prop, and take three shots from different angles. Pick the best and do a 3-minute edit. You’ll start to recognise patterns in what works for your style — and that’s the real hack: practice + intention = photos that feel effortless.